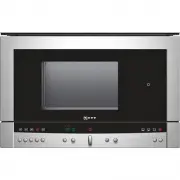
Neff C44L20N0 - Mode d'emploi - Page 5

Mode d'emploi pour Neff C44L20N0 Cuiseur à vapeur en format pdf, lire en ligne gratuitement. Nous espérons qu'il vous aidera à résoudre les questions que vous vous posez lors de l'utilisation de vos appareils.

Si vous avez encore des questions, posez-les dans les commentaires après les instructions.

"Télécharger le manuel" signifie que vous devez attendre que le fichier soit téléchargé et que vous puissiez le lire en ligne. Certaines instructions sont très volumineuses et le temps qu'elles mettent à s'afficher dépend de votre vitesse d'accès à Internet.
Page:
/ 11
Télécharger le manuel

de

Ø

M on ta ge an le itu ng

Wichtige Hinweise

Bei allen Montagearbeiten muss das Gerät spannungslos sein.
Gerät vor dem Einbau auf Transportschäden prüfen.

ã=

Kippgefahr!

Öffnen Sie die Gerätetür nicht, bevor das Gerät vollständig im

Möbel eingeschoben ist. Vor dem Festschrauben des Gerätes

die Tür nur vorsichtig öffnen. Es kann kippen bzw. aus dem

Möbel fallen.

Möbel vorbereiten

Nur ein fachgerechter Einbau nach dieser Montageanleitung

garantiert einen sicheren Gebrauch. Bei Schäden durch fal-

schen Einbau haftet der Monteur.
Einbaumöbel müssen bis 90 °C temperaturbeständig sein, ang-

renzende Möbelfronten bis 70 °C.
Alle Ausschnittarbeiten an Möbel und Arbeitsplatte vor dem Ein-

setzen der Geräte durchführen. Späne entfernen! Die Funktion

von elektrischen Bauteilen kann beeinträchtigt werden.
Vorsicht beim Einbau! Teile, die während der Montage

zugänglich sind, können scharfkantig sein. Zur Vermeidung von

Schnittverletzungen Schutzhandschuhe tragen.
Lüftungsschlitze und Ansaugöffnungen nicht verdecken.
Der Einbauschrank darf hinter dem Gerät keine Rückwand

haben.
Mindesteinbauhöhe 85 cm.

Gerät im Oberschrank - Bild 1a

Zur Belüftung des Gerätes müssen alle Zwischenböden einen

Spalt von 18 mm zur Aufstellwand aufweisen.
Bei der Montage im Oberschrank müssen alle vier Gerätefüße

entfernt werden.

Gerät im Hochschrank - Bild 1b

Zur Belüftung des Gerätes müssen alle Zwischenböden einen

Spalt von 45 mm zur Aufstellwand aufweisen.
Zur Regulierung der Höhe des Gerätes können Sie die Gerä-

tefüße anpassen.
Gerät nur so hoch einbauen, dass Zubehör problemlos entnom-

men werden kann.
Das Gerät kann auch über einem belüfteten Backofen oder über

einem Kühlgerät montiert werden.

Gerät anschließen

Das Gerät ist steckerfertig und darf nur mit dem mitgelieferten

Anschlusskabel angeschlossen werden.
Die Absicherung muss min. 10 Ampere (L- oder B-Automat)

betragen.
Die Netzspannung muss der auf dem Typenschild angegebenen

Spannung entsprechen.
Das Gerät darf nur an eine vorschriftsmäßig installierte Schutz-

kontakt-Steckdose angeschlossen werden.
Ein längeres Anschlusskabel ist beim Kundendienst erhältlich.

Das Anschlusskabel darf nur von einem konzessionierten

Fachmann durch ein Originalkabel ersetzt werden.
Wenn der Stecker nach dem Einbau nicht mehr erreichbar ist,

muss installationsseitig eine allpolige Trennvorrichtung mit

einem Kontaktabstand von min. 3 mm vorhanden sein.
Das Verlegen einer Steckdose darf nur vom Elektrofachmann

unter Berücksichtigung der einschlägigen Vorschriften ausge-

führt werden.
Der Berührungsschutz muss durch den Einbau gewährleistet

sein.

Gerät befestigen

1.

Gerät ganz einschieben. Dabei Anschlusskabel nicht knicken,

einklemmen oder über scharfe Kanten führen.

2.

Gerät mit der Wasserwaage exakt waagrecht ausrichten.
Zwischen Gerät und angrenzenden Möbelfronten ist ein Luft-

spalt von 5 mm erforderlich.

3.

Gerät mittig ausrichten und die zwei Befestigungsschrauben

an der Seite ohne Scharnier festschrauben - Bild 4.

4.

An der Seite mit Scharnier mit einem Bohrer (ø 2 mm) zwei Lö-

cher für die Befestigungsschrauben vorbohren - Bild 5.

5.

Anschließend die zwei Befestigungsschrauben an der Seite mit

Scharnier schräg festschrauben - Bild 6.

Ausbau

1.

Gerät spannungslos machen.

2.

Befestigungsschrauben lösen.

3.

Gerät leicht anheben und ganz herausziehen.

Ein defektes Anschlusskabel darf nur durch ein spezielles

Ersatzanschlusskabel vom Hersteller oder vom Kundendienst

ersetzt werden.

en

Ú

In sta llat ion in stru ction s

Important notes

The appliance must be disconnected from the power supply

during all installation work.
Before installation, check the appliance for transportation

damage.

ã=

Risk of tipping!

Do not open the appliance door until the appliance is fully fitted

into the unit. Only open the door of the appliance with care

before it has been securely fastened in place. It may tip and fall

out of the unit.

Preparing the kitchen units

Safe use of this appliance can only be guaranteed if it has been

installed professionally in accordance with these installation

instructions. The installer is liable for damages incurred as a

result of incorrect installation.
Units into which ovens are to be fitted must be heat-resistant up

to 90 °C and adjacent cabinets up to 70 °C.
Carry out all cut-out work on the furniture unit and worktop

before fitting the appliances. Remove shavings. Otherwise, the

correct operation of electrical components may be adversely

affected.
Caution during installation. Parts that are accessible during

installation may have sharp edges. Wear protective gloves to

prevent injury from cuts.
Do not cover ventilation slots and air intake openings.
The fitted cabinet must not have a rear panel behind the

appliance.
Minimum installation height: 85 cm.

Appliance in a wall-hanging cupboard - Fig. 1a

To ventilate the appliance, there must be a gap of 18 mm

between all intermediate floors and the wall.
When installing in the wall-hanging cupboard, all appliance feet

must be removed.

Appliance in a tall unit - Fig. 1b

To ventilate the appliance, there must be a gap of 45 mm

between all intermediate floors and the wall.
To control the height of the appliance, you can adjust the

appliance feet.
Only fit the appliance up to a height which allows accessories to

be easily removed.
The appliance can also be fitted above a ventilated oven or

above a cooling unit.

Connecting the appliance to the power supply

The appliance is fitted with a plug and must only be connected

using the power cable provided.
The fuse protection must be rated at a minimum 10 amperes (L

or B-type circuit breakers).
The mains voltage must correspond to the voltage specified on

the rating plate.
The appliance must only be connected to a protective contact

socket which has been correctly installed.
A longer power cable is available at the after-sales service. The

power cable must only be replaced by a licensed expert

electrician using a genuine replacement cable.
If the plug is no longer accessible following installation, an all-

pole isolating switch must be present on the installation side

with a contact gap of at least 3 mm.
A socket must only be installed by a qualified electrician, and in

accordance with the appropriate regulations.
Contact protection must be ensured by the method of

installation.

manuelsdutilisation.com
Vous avez encore des questions ?

Vous n'avez pas trouvé votre réponse dans le manuel ou vous avez d'autres problèmes ? Posez votre question dans le formulaire ci-dessous en décrivant en détail votre situation afin que d'autres personnes et experts puissent y répondre. Si vous savez comment résoudre le problème d'une autre personne, donnez-lui un indice :)

Poser une question