GE GTS18HYNRFS - Manuel d'utilisation - Page 2

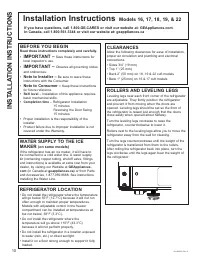

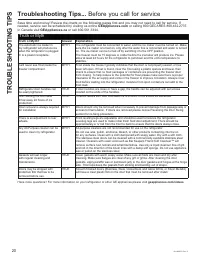


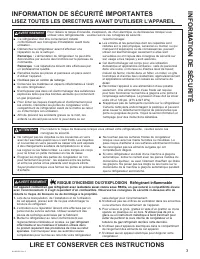

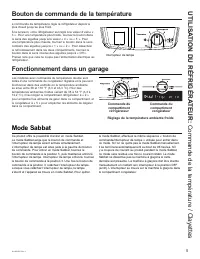


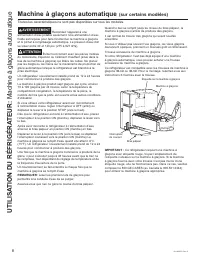

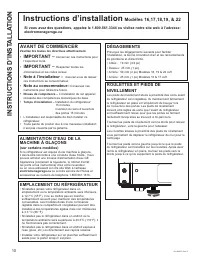


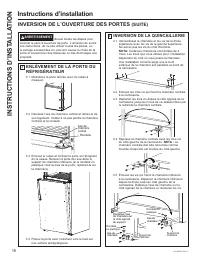


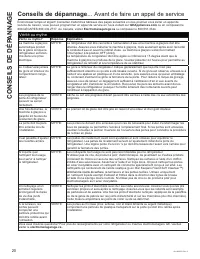

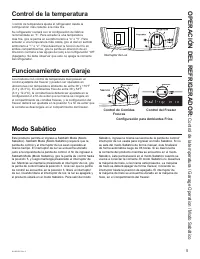
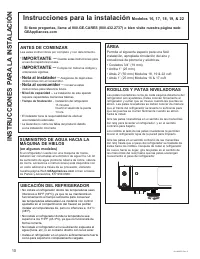
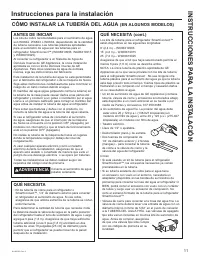

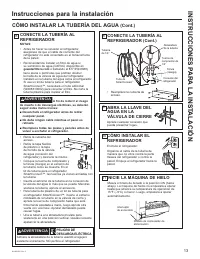
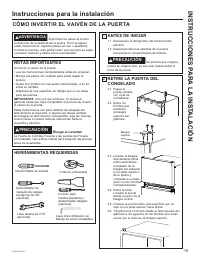
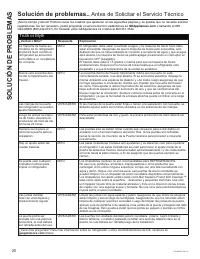

Table des matières:
- Page 7 – RÉFRIGÉRATEUR; Congélateur au sommet
- Page 8 – NOUS VOUS REMERCIONS D’ACCUEILLIR GE APPLIANCES CHEZ VOUS; sommes heureux de vous accueillir dans notre famille.
- Page 10 – BRANCHEMENTS ÉLECTRIQUES; RISQUE DE CHOC ÉLECTRIQUE; INFORMA; MISE AU REBUT APPROPRIÉE DE VOTRE ANCIEN RÉFRIGÉRATEUR; RISQUE DE SUFFOQUER OU D’Y ÊTRE EMPRISONNÉ; Mise au rebut des produits réfrigérants et en mousse; RISQUE D’INCENDIE OU D’EXPLOSION
- Page 12 – Clayettes pleine largeur
- Page 13 – Tiroir et du couvercle; Enlèvement du bac de rangement; Pour remettre les bacs:; Bacs de rangement
- Page 20 – INSTALLATION DE LA POIGNÉE; ÉCUSSON ET LE BOUCHON; POIGNÉE EN PLASTIQUE
- Page 21 – INVERSION DE L’OUVERTURE DES PORTES; ENLÈVEMENT DE LA PORTE DU; OUTILS REQUIS; Portes pesantes
- Page 23 – INVERSION DES POIGNÉES DE PORTE
- Page 24 – REMISE EN PLACE DES PORTES
- Page 25 – CRAQUEMENTS et; CONSEILS DE DÉP; Bruits normaux de fonctionnement
- Page 28 – Soutien au consommateur; SOUTIEN AU
10
49-1000478 Rev. 2
ROLLERS AND LEVELING LEGS
Leveling legs near each front corner of the refrigerator
are adjustable. They firmly position the refrigerator
and prevent it from moving when the doors are
opened. Leveling legs should be set so the front of
the refrigerator is raised just enough that the doors
close easily when opened about halfway.
Turn the leveling legs clockwise to raise the
refrigerator, counterclockwise to lower it.
Rollers next to the leveling legs allow you to move the
refrigerator away from the wall for cleaning.
Turn the legs counterclockwise until the weight of the
refrigerator is transferred from them to the rollers.
After rolling the refrigerator back into place, turn the
legs clockwise until the legs again bear the weight of
the refrigerator.
Installation Instructions
Models 16, 17, 18, 19, & 22
CLEARANCES
Allow the following clearances for ease of installation,
proper air circulation and plumbing and electrical
connections.
6LGHV´PP
7RS´PP
%DFN´PPRQ FXIWPRGHOV
• Back 1" (25 mm) on 16 & 17 cuft models
BEFORE YOU BEGIN
Read these instructions completely and carefully.
•
IMPORTANT –
Save these instructions for
local inspector’s use.
•
IMPORTANT –
Observe all governing codes
and ordinances.
•
Note to Installer –
Be sure to leave these
instructions with the Consumer.
•
Note to Consumer –
.HHSWKHVHLQVWUXFWLRQV
for future reference.
•
Skill level
±,QVWDOODWLRQRIWKLVDSSOLDQFHUHTXLUHV
basic mechanical skills.
•
Completion time
±5HIULJHUDWRU,QVWDOODWLRQ
15
minutes
5HYHUVLQJWKH'RRU6ZLQJ
15 minutes
•
Proper installation is the responsibility of the
installer.
•
Product failure due to improper installation is not
covered under the Warranty.
REFRIGERATOR LOCATION
•
'RQRWLQVWDOOWKHUHIULJHUDWRUZKHUHWKHWHPSHUDWXUH
will go below 55°F (12.7°C) because it will not run
often enough to maintain proper temperatures.
0RGHOVZLWKDGMXVWDEOHFRQWUROLQWKHIUHH]HU
compartment can be installed at temperatures at,
but not below, 38°F (3.3°C).
•
'RQRWLQVWDOOWKHUHIULJHUDWRUZKHUHWKH
temperature will go above 110°F (43.3°C)
because it will not perform properly.
•
'RQRWLQVWDOOWKHUHIULJHUDWRULQDORFDWLRQH[SRVHG
to water (rain, etc.) or direct sunlight.
,QVWDOOLWRQDIORRUVWURQJHQRXJKWRVXSSRUWLWIXOO\
loaded.
WATER SUPPLY TO THE ICE
MAKER
(on some models)
,IWKHUHIULJHUDWRUKDVDQLFHPDNHULWZLOOKDYHWR
be connected to a cold water line. A water supply
kit (containing copper tubing, shutoff valve, fittings
and instructions) is available at extra cost from your
dealer, by visiting our Website at
GEAppliances.
com
(in Canada at
geappliances.ca
) or from Parts
and Accessories, 1.877.959.8688. See instructions
,QVWDOOLQJWKH:DWHU/LQH
If you have questions, call 1.800.GE.CARES or visit our website at: GEAppliances.com
.
In Canada, call 1.800.561.3344 or visit our website at: geappliances.ca
INST
ALLA
TION INSTRUCTIONS
„Téléchargement du manuel“ signifie que vous devez attendre que le fichier soit complètement chargé avant de pouvoir le lire en ligne. Certains manuels sont très volumineux, et le temps de chargement dépend de la vitesse de votre connexion Internet.
Résumé
MESURES DE SÉCURITÉ . . . . . . . . . 3 Instructions de fonctionnement Bouton de commande de la température . 5 Fonctionnement dans un garage . . . . . . . . . 5 Mode Sabbat . . . . . . . . . . . . . . . . . . . . . . . . . . 5 Clayettes du compartiment réfrigérateur . .6 Clayettes du compartimen...
2 49-1000478 Rev. 2 NOUS VOUS REMERCIONS D’ACCUEILLIR GE APPLIANCES CHEZ VOUS Que vous ayez grandi avec GE Appliances ou qu’il s’agisse de votre première acquisition, nous sommes heureux de vous accueillir dans notre famille. Nous sommes fiers du savoir-faire, de l’innovation et de l’esthétique qui...
4 49-1000478 Rev. 2 Ne coupez pas ou n’enlevez pas, sous aucun prétexte, la troisième broche de mise à la terre du cordon d’alimentation. Pour des raisons de sécurité, cet appareil doit être correctement mis à la terre. Le cordon d’alimentation de cet appareil est équipé d’une fiche à trois broches ...
Autres modèles de réfrigérateurs GE
-
 GE GFD28GELDS
-
 GE GFD28GYNFS
-
 GE GFE28GELDS
-
 GE GFE28GYNFS
-
 GE GIE17GSNRSS
-
 GE GIE18DTNRBB
-
GE GIE18DTNRWW
-
 GE GIE18GCNRSA
-
GE GIE18GSNRSS
-
GE GIE18GTNRBB