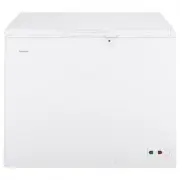
Hotpoint HCM9DMWW - Manuel d'utilisation - Page 2

Table des matières:
- Page 6 – UTILISATION DU CONGÉLATEUR; CONGÉLATEURS
- Page 8 – Risque d’explosion.; MISE AU REBUT APPROPRIÉE DE VOTRE ANCIEN CONGÉLATEUR; BRANCHEMENTS ÉLECTRIQUES; RISQUE DE CHOC ÉLECTRIQUE.; RISQUE DE SUFFOQUER OU D’Y ÊTRE EMPRISONNÉ; Mise au rebut des produits réfrigérants et en mousse
- Page 10 – Fonctionnalités; Panier coulissant; Verrou à éjection de clé; Mise à la terre recommandée
- Page 12 – Nettoyage de votre congélateur; Lors d’une panne de courant prolongée; Déménagement
- Page 13 – Lorsque vous partez en vacances
- Page 15 – $YDQWGHIDLUHXQDSSHOGHVHUYLFH
- Page 17 – Caractéristiques normales de fonctionnement
6
49-60798-1
USING THE FREEZER:
'HIURVWLQJ,QVWUXFWLRQV
Defrosting Instructions
In most climates, defrosting will be necessary only about
twice a year.
To have your freezer operate most efficiently, do not
SHUPLWPRUHWKDQ´PPWKLFNQHVVRIIURVWRQ
average, to accumulate on the walls.
To remove frost, scrape with a plastic or wood spatula or
scraper.
Do not use an ice pick, metal, or sharp-edged
instrument
as it may damage or scratch the freezer.
Do not use boiling water
as it may damage the freezer.
Do not use any electrical device in defrosting your
freezer.
For Complete Defrosting
7XUQWKHWHPSHUDWXUHFRQWUROWRIDUOHIW2))VHWWLQJ
and unplug the freezer.
2. Remove all food and place it in corrugated boxes,
LQVXODWHGEDJVSLFQLFFRROHUVHWF8VHWRZHOVDQG
newspapers for insulation as needed.
3. Place a tray (not included) in front of the freezer,
beneath the exterior drain plug to collect the water.
Pull out the drain plug about 1" (2.5 cm) until the
drain hole on the plug shows completely. Turn the
drain plug clockwise until the arrow is pointed down.
8QVFUHZFRXQWHUFORFNZLVHWRUHPRYHWKHLQWHULRU
drain plug. This allows the water to flow out into the
tray.
NOTE:
Water that has accumulated at the bottom of
the freezer during defrosting will drain into the tray.
Monitor the tray under the drain to avoid overflow.
4. With the lid open, you may choose to use pans of
KRWWDSZDWHUOHVVWKDQ)>&@WRVSHHG
GHIURVWLQJ'LUHFWLQJDLUIURPDQHOHFWULFIDQLQWR
WKHIUHH]HUZLOODOVRKHOS'RQRWSODFHIDQRUDQ\
electrical device in the freezer. Remove large pieces
before they melt.
5. Wipe water from walls with a towel or sponge.
6. After defrosting, clean the inside of the freezer (see
Care and Cleaning).
7. Replace the drain plugs.
8. Plug in the freezer. Return
the temperature control to its
previous position and return
food to the freezer.
WARNING
)UHH]HUPXVWEHXQSOXJJHGWRDYRLG
electrical hazard from power source when defrosting
unit.
Drain hole
Arrow
Interior
Drain plug
„Téléchargement du manuel“ signifie que vous devez attendre que le fichier soit complètement chargé avant de pouvoir le lire en ligne. Certains manuels sont très volumineux, et le temps de chargement dépend de la vitesse de votre connexion Internet.
Résumé
Inscrivez les numéros de modèle et de série ici : Numéro de modèle : ______ Numéro de série : _________ Vous trouverez l’étiquette signalétique sur le côté droit du congélateur au-dessus du couvercle du compartiment machine. MANUEL D’UTILISATION ET D’INSTALLATION Modèle horizontaux, à dégivrage non...
49-60798-1 3 INFORMA TION DE SÉCURITÉ LIRE ET CONSERVER CES INSTRUCTIONS INSTRUCTIONS IMPORTANTES DE SÉCURITÉ LIRE TOUTES LES INSTRUCTIONS AVANT D'UTILISER L'APPAREIL INSTALLATION AVERTISSEMENT Risque d’explosion. Conservez les matériaux et vapeurs inflammables tels que l’essence à l’écart de vo...
49-60798-1 5 UTILISA TION DU CONGÉLA T EUR: Fonctionnalités Fonctionnalités Panier coulissant 5DQJH]OHVDOLPHQWVGHSHWLWHWDLOOHGDQVOHSDQLHUSRXUpYLWHU de les perdre au fond du congélateur. Il est possible de déplacer le panier de gauche à droite ou de le retirer pour attraper ou déposer des aliments r...
Autres modèles de congélateurs Hotpoint
-
 Hotpoint HCM7SMWW
-
 Hotpoint HCM9CTCD
-
 Hotpoint HCM9STWW
-
 Hotpoint HHM5SMWW
-
 Hotpoint HHM5SRWW
-
 Hotpoint HHM7SMWW
-
 Hotpoint HHM7SRWW


