Hoover C1320- Manuels
Hoover C1320- Manuel d'utilisation, Notice en ligne au format PDF.
Manuels:
Manuel d'utilisation Hoover C1320


Résumé
2 2 THIS VACUUM IS INTENDED FOR COMMERCIAL USE ONLY. IMPORTANT SAFETY INSTRUCTIONS When you use an appliance, basic precautions should always be followed, including the following: • READ ALL INSTRUCTIONS BEFORE USING THE APPLIANCE. • ALWAYS FOLLOW THESE SAFETY INSTRUCTIONS. • DO NOT LEAVE VACUUM CLE...
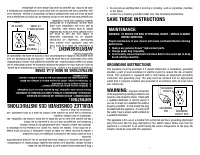
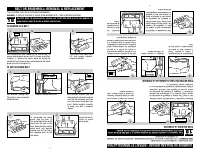
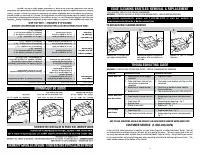
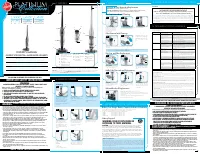
MAINTENANCE: WARNING: TO REDUCE THE RISK OF PERSONAL INJURY - UNPLUG CLEANER BEFORE SERVICING. Proper maintenance of your cleaner will assure continued effective cleaning performance.1. Always use genuine Hoover ® replacement parts. 2. Change paper bag frequently. 3. Occasionally remove brushroll an...
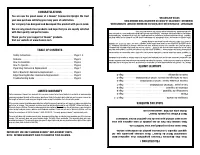
CONGRATULATIONS You are now the proud owner of a Hoover ® Commercial Upright. We trust your new purchase will bring you many years of satisfaction.Our company has designed and developed this product with you in mind.We are very proud of our products and hope that you are equally satisfied with their...
Notice Hoover C1320


Résumé
2 2 THIS VACUUM IS INTENDED FOR COMMERCIAL USE ONLY. IMPORTANT SAFETY INSTRUCTIONS When you use an appliance, basic precautions should always be followed, including the following: • READ ALL INSTRUCTIONS BEFORE USING THE APPLIANCE. • ALWAYS FOLLOW THESE SAFETY INSTRUCTIONS. • DO NOT LEAVE VACUUM CLE...
MAINTENANCE: WARNING: TO REDUCE THE RISK OF PERSONAL INJURY - UNPLUG CLEANER BEFORE SERVICING. Proper maintenance of your cleaner will assure continued effective cleaning performance.1. Always use genuine Hoover ® replacement parts. 2. Change paper bag frequently. 3. Occasionally remove brushroll an...
CONGRATULATIONS You are now the proud owner of a Hoover ® Commercial Upright. We trust your new purchase will bring you many years of satisfaction.Our company has designed and developed this product with you in mind.We are very proud of our products and hope that you are equally satisfied with their...
Hoover Manuels
-
 Hoover UH70200
Notice
Hoover UH70200
Notice
-
 Hoover U4707
Notice
Hoover U4707
Notice
-
Hoover UH70105
Notice
-
 Hoover BH50030
Notice
Hoover BH50030
Notice
-
 Hoover BH50015
Notice
Hoover BH50015
Notice
-
 Hoover BH50010
Notice
Hoover BH50010
Notice
-
 Hoover UH70120
Notice
Hoover UH70120
Notice
-
 Hoover WH10600
Manuel d'utilisation
Hoover WH10600
Manuel d'utilisation
-
 Hoover hard floor polisher
Manuel d'utilisation
Hoover hard floor polisher
Manuel d'utilisation
-
Hoover hard floor polisher
Notice
-
 Hoover Battery Chargers
Manuel d'utilisation
Hoover Battery Chargers
Manuel d'utilisation
-
 Hoover E1
Manuel d'utilisation
Hoover E1
Manuel d'utilisation
-
Hoover E1
Notice
-
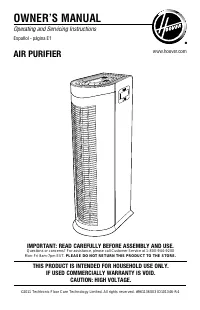
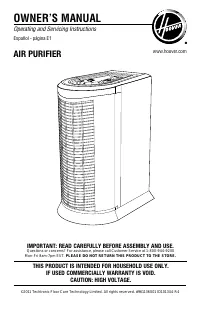 Hoover Air Cleaner
Manuel d'utilisation
Hoover Air Cleaner
Manuel d'utilisation
-
Hoover Air Cleaner
Notice
-
 Hoover F5914901NC
Manuel d'utilisation
Hoover F5914901NC
Manuel d'utilisation
-
 Hoover F5914900
Manuel d'utilisation
Hoover F5914900
Manuel d'utilisation
-
 Hoover MISTRAL-TMI1815 019
Manuel d'utilisation
Hoover MISTRAL-TMI1815 019
Manuel d'utilisation
-
 Hoover TELIOS PLUS TTE 2304 019
Manuel d'utilisation
Hoover TELIOS PLUS TTE 2304 019
Manuel d'utilisation
-
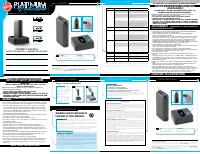
 Hoover PLATINUM Cordless Stick Vac
Manuel d'utilisation
Hoover PLATINUM Cordless Stick Vac
Manuel d'utilisation