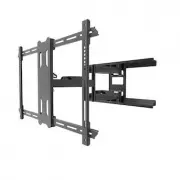
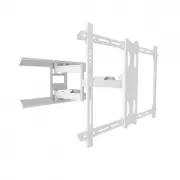
Kanto PT300 - Manuels
Support TV Kanto PT300 - Manuel d'utilisation en ligne au format PDF.
Manuels:
Manuel d'utilisation Kanto PT300

Résumé
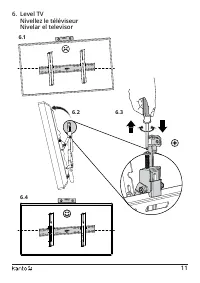
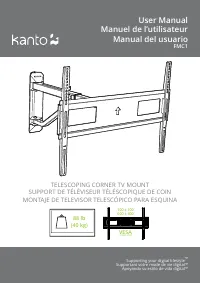
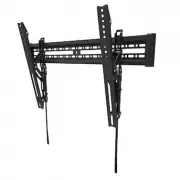
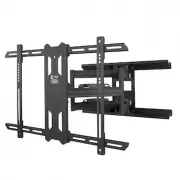
2 See installation video online at: Regarder la video d’installation en ligne à: Vea el vídeo de instalación online en:www.kantomounts.com/resources Thank you for choosing Kanto Read these instructions fully before assembly and installation. If you do not understand these directions, or have any dou...
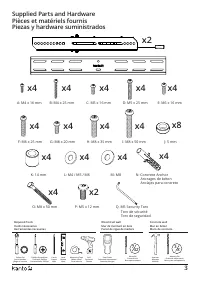
3 x2 A: M4 x 16 mm C: M5 x 16 mm B: M4 x 25 mm x4 x4 x4 J: 5 mm x8 D: M5 x 25 mm E: M6 x 16 mm x4 x4 F: M6 x 25 mm H: M8 x 35 mm G: M8 x 20 mm x4 x4 x4 I : M8 x 50 mm x4 L: M4 / M5 / M6 x4 K: 14 mm x4 x4 M: M8 O: M8 x 50 mm x4 N: Concrete Anchor Ancrages de béton Anclajes para concreto x4 x2 P: M5 x...
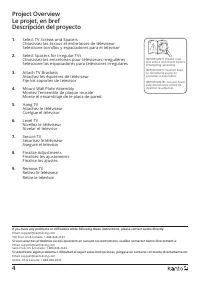
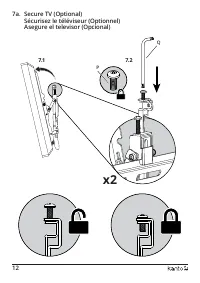
4 If you have any problems or difficulties while following these instructions, please contact Kanto directly: Email: [email protected] Toll Free: US & Canada: 1-888-848-2643 Si vous avez des problè mes ou des questions en suivant ces instructions, veuillez contacter Kanto directement à : Email: [e...
Kanto Supports TV Manuels
-
 Kanto FMC1
Manuel d'utilisation
Kanto FMC1
Manuel d'utilisation
-
 Kanto KT3260
Manuel d'utilisation
Kanto KT3260
Manuel d'utilisation
-
 Kanto PDX650
Manuel d'utilisation
Kanto PDX650
Manuel d'utilisation
-
 Kanto PDX650B
Manuel d'utilisation
Kanto PDX650B
Manuel d'utilisation
-
 Kanto PDX650G
Manuel d'utilisation
Kanto PDX650G
Manuel d'utilisation
-
 Kanto PDX650W
Manuel d'utilisation
Kanto PDX650W
Manuel d'utilisation
-
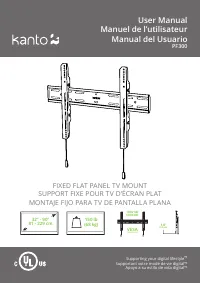 Kanto PF300
Manuel d'utilisation
Kanto PF300
Manuel d'utilisation
-
 Kanto PSC350
Manuel d'utilisation
Kanto PSC350
Manuel d'utilisation
-
 Kanto SDX600
Manuel d'utilisation
Kanto SDX600
Manuel d'utilisation
-
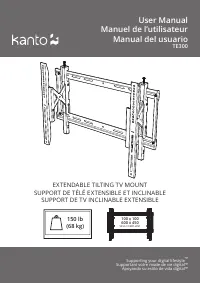 Kanto TE300
Manuel d'utilisation
Kanto TE300
Manuel d'utilisation