Philips HC3100/13 - Mode d'emploi
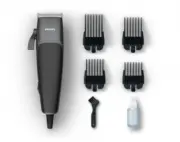
Philips HC3100/13 - Mode d'emploi, à lire gratuitement en ligne au format PDF. Nous espérons que cela vous aidera à résoudre toutes les questions que vous pourriez avoir. Si vous avez encore des questions, contactez-nous via le formulaire de contact.


Table des matières:
- Page 1 – FRANÇAIS; Informations de sécurité
- Page 2 – Nettoyage et entretien; Attention; Utilisation de l‘appareil; Danger
- Page 3 – Atenção; Geral; Perigo; Problème; PORTUGUÊS; Informações de segurança; Remplacement de la lame; Limites de la garantie
Tips & tricks
- To clip in the most effective way, move the
appliance against the direction of hair growth.
- Since hair grows in different directions, you
need to move the appliance in different
directions (upwards, downwards or across).
- Make overlapping passes over the head to
ensure that the appliance catches all hairs that
need to be cut.
- Make sure that the flat part of the hair clipping
comb is fully in contact with the scalp to obtain
an even clipping result.
- If you wish to shape contours, tilt the appliance.
- Regularly remove cut hair from the hair clipping
comb. If a lot of hair has accumulated in the
comb, remove it from the appliance and blow
and/or shake the hair out of it.
Detaching and attaching click-on combs
1 To detach a comb from the cutting element,
push the hook at the back of the comb
upwards, then unhook it at the
front (Fig. 4)
.
2 To attach a comb onto the cutting element,
hook it onto the front of the cutting element
and push it down at the back
(‚click‘) (Fig. 5)
.
Preparing for use
Use the adjustment lever on the left side of the
appliance to set the desired hair length. Move the
adjustment lever upwards to reduce the cutting
length and move it downwards to increase the
cutting length. When you hear a click, you have
reached the next length
setting (Fig. 6)
.
Fine adjustment
You can reduce the cutting length manually to
clip even closer to the skin, but make sure that
the cutter does not emerge above the guard to
avoid cutting yourself.
1 To reduce the cutting length manually, loosen
the screws by turning the screwdriver a quarter
turn (Fig. 7)
.
Make sure that you only loosen the screws
instead of completely unscrewing them.
2 Push the guard upwards until it is at the
required length
setting (Fig. 8)
.
3 Tighten the screws.
Note: When you loosen or tighten the screws,
the guard can move. To keep it in position, hold
the sides of the guard in place while you tighten
the
screws (Fig. 9)
.
4 The cutter should not emerge above the guard.
To check this, switch on the appliance and
study the cutter and guard closely, preferably
from the back. If the cutter emerges above the
guard, adjust it as described above.
Switching the appliance on and off
1 To switch on the appliance, push the on/off-
slide
upwards (Fig. 10)
.
2 To switch off the appliance, push the on/off-
slide
downwards (Fig. 10)
.
Clipping with click-on comb
1 Place the desired comb onto the appliance
(‘click’) (Fig. 5)
.
2 Switch on the
appliance (Fig. 10)
.
3 Place the comb on the scalp and move the
appliance through the hair slowly.
Comb sizes
Comb sizes in mm
Comb sizes in inches
3
1/8
6
1/4
9
3/8
12
1/2
16 (HC5100 only)
5/8 (HC5100 only)
19 (HC5100 only)
3/4 (HC5100 only)
25 (HC5100 only)
1 (HC5100 only)
Clipping without click-on comb
You can use the appliance without click-on comb
to clip your hair very close to the skin or to shape
specific areas.
1 Detach the click-on
comb (Fig. 4)
.
2 Switch on the
appliance (Fig. 10)
.
3 To obtain an even clipping result, place the
appliance flat on the skin. Move the appliance
slowly and smoothly.
Shaping
1 Detach the click-on
comb (Fig. 4)
.
2 Switch on the
appliance (Fig. 10)
.
3 To shape contours, turn the appliance and
make downward strokes. Move the appliance
slowly and smoothly.
Cleaning and maintenance
Warning: Keep the appliance and the mains cord
dry. Only clean the appliance and the mains cord
with the cleaning brush supplied.
Caution: Never use compressed air, scouring pads,
abrasive cleaning agents or aggressive liquids
such as alcohol, petrol or acetone to clean the
appliance.
Caution: Do not use any sharp objects to clean the
appliance.
Clean the appliance after every use.
1 Make sure the appliance is switched off and
disconnected from the mains.
2 Detach the click-on
comb (Fig. 4)
.
3 Clean the cutting unit and the click-on comb
with the cleaning brush
supplied (Fig. 11, Fig. 12)
.
4 For optimal clipping performance, lubricate the
cutter frequently with clipper
oil (Fig. 13)
.
Storage
Put the protection cap on the appliance to prevent
damage (HC5100 only).
Replacement
Replace the cutting unit if it is damaged or worn.
Only replace the cutting unit with an original Philips
cutting
unit (see ‚Ordering accessories‘)
.
Replacing the blade
1 Hold the cutting unit in place with your thumb
and remove the screws in the cutting unit
carefully with a
screwdriver (
Fig. 14
)
.
2 Remove the guard gently and slowly. When
you do so, the spring and cutter emerge. Make
sure you hold the appliance above a surface to
prevent the spring and cutter from falling onto
the floor.
3 Place the new cutter onto the spring.
Note: the holes in the cutter fit exactly onto the
projections in the
spring (Fig. 15)
.
4 Place the back of the guard onto the top of
the handle, and gently push it onto the cutter,
pushing the cutter and spring
downwards (Fig.
16)
.
5 Hold the cutting unit in place by placing your
thumb between the two holes in the
guard (Fig. 17)
.
6 With your other hand, put the screws back into
place one by
one (Fig. 18)
.
7 Fasten the screws with a screwdriver.
8 Perform the fine adjustment
procedure
(see‚ Fine adjustment‘)
.
Ordering accessories
To buy accessories or spare parts, visit
www.shop.philips.com/service
or go to your
Philips dealer. You can also contact the Philips
Consumer Care Centre in your country (see the
worldwide guarantee leaflet for contact details).
The following accessories and spare parts are
available:
- HC4100 Replacement pack
Guarantee and support
If you need information or support, please visit
www.philips.com/support
or read the separate
worldwide guarantee leaflet.
Guarantee restrictions
Cutting units are not covered by the terms of the
international guarantee because they are subject
to wear.
Recycling
- Do not throw away the product with the
normal household waste at the end of its life,
but hand it in at an official collection point for
recycling. By doing this, you help to preserve
the environment.
- Follow your country’s rules for the separate
collection of electrical and electronic products
and rechargeable batteries. Correct disposal
helps prevent negative consequences for the
environment and human health.
Troubleshooting
This chapter summarizes the most common
problems you could encounter with the appliance.
If you are unable to solve the problem with the
information below, visit
www.philips.com/support
for
a list of frequently asked questions or contact the
Consumer Care Center in your country.
Problem
Possible
cause
Solution
The cutter
emerges
above the
teeth of the
guard.
You have not
performed
the fine
adjustment
procedure
correctly.
Perform the
fine adjustment
procedure (see
'Fine adjustment')
.
The cutter
and guard
have come
loose and
have fallen
out.
You have
unscrewed
the screws
too far.
Reattach the cutter
and the
guard (see
'Replacing the
blade')
.
FRANÇAIS
Description générale (fig. 1)
1 Capot de protection (HC5100 uniquement)
2 Bloc tondeuse (lame et grille)
3 Vis
4 Levier de réglage
5 Bouton marche/arrêt
6 Sabots amovibles
7 Sabot pour cheveux (HC5100 uniquement)
8 Ciseaux (HC5100 uniquement)
9 Brosse de nettoyage
10 Huile pour tondeuse
Remarque : Non illustrés : câble et fiche.
Introduction
Félicitations pour votre achat et bienvenue dans
l‘univers Philips ! Pour profiter pleinement de
l‘assistance offerte par Philips, enregistrez votre
produit à l‘adresse suivante :
www.philips.com/
welcome
.
Informations de sécurité
importantes
Lisez attentivement ces
informations importantes
avant d‘utiliser l‘appareil et ses
accessoires et conservez-les
pour un usage ultérieur. Les
accessoires fournis peuvent
varier selon les différents
produits.
« Chargement du manuel » signifie que vous devez attendre que le fichier soit complètement chargé avant de pouvoir le lire en ligne. Certains manuels sont très volumineux, et le temps de chargement dépend de la vitesse de votre connexion Internet.
Ce manuel vous a-t-il été utile ?
À propos de ce manuel
- Marque
- Philips
- Modèle
- HC3100/13
- Type de document
- Mode d'emploi
- Langue(s)
- Français
- Pages
- 3
- Taille du fichier
- 1 MB
- Format
Résumé
Tips & tricks - To clip in the most effective way, move the appliance against the direction of hair growth. - Since hair grows in different directions, you need to move the appliance in different directions (upwards, downwards or across). - Make overlapping passes over the head to ensure that th...
Tailles de sabot Tailles de sabot en mm Tailles de sabot en pouces 3 1/8 6 1/4 9 3/8 12 1/2 16 (HC5100 uniquement) 5/8 (HC5100 uniquement) 19 (HC5100 uniquement) 3/4 (HC5100 uniquement) 25 (HC5100 uniquement) 1 (HC5100 uniquement) Utilisation sans sabot amovible Vous pouvez utiliser l‘appareil sans ...
partido, pois isto pode provocar ferimentos. Substitua sempre uma peça danificada por uma equivalente de origem. Atenção - Utilize este aparelho apenas para o fim a que se destina, conforme indicado no manual do utilizador. - Por questões de higiene, o aparelho só deve ser utilizado por uma pessoa. ...
Poser une question
Manuels associés
Autres Philips populaires

Plus de modèles autres Philips
 Mode d'emploi Philips GC9660/36
 Mode d'emploi Philips GC9665/30
 Mode d'emploi Philips GC9682/86
 Mode d'emploi Philips GCA1000/60
 Mode d'emploi Philips GCA2100/20
 Notice Philips HC065
 Mode d'emploi Philips HC3505/15
 Mode d'emploi Philips HC3510/15
 Mode d'emploi Philips HC3530/15
 Mode d'emploi Philips HC5100/15
 Mode d'emploi Philips HC5440/80
 Mode d'emploi Philips HC5610/15
 Mode d'emploi Philips HC5630/13
 Mode d'emploi Philips HC5630/15
 Mode d'emploi Philips HC5632/15
 Mode d'emploi Philips HC5650/15
 Mode d'emploi Philips HC7650/15
 Notice Philips HC8650
 Mode d'emploi Philips HC9450/20