Philips RI8174/00 - Manuel d'utilisation

Philips RI8174/00 - Manuel d'utilisation, à lire gratuitement en ligne au format PDF. Nous espérons que cela vous aidera à résoudre toutes les questions que vous pourriez avoir. Si vous avez encore des questions, contactez-nous via le formulaire de contact.


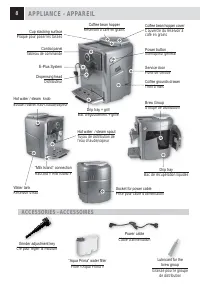
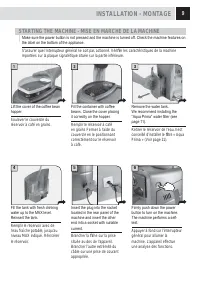
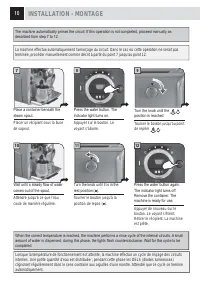
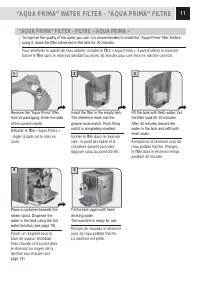
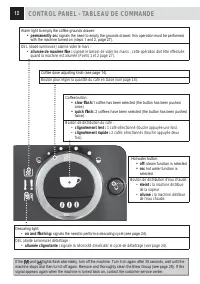
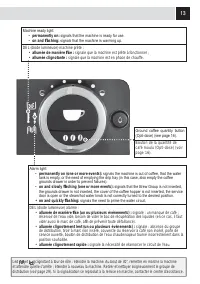

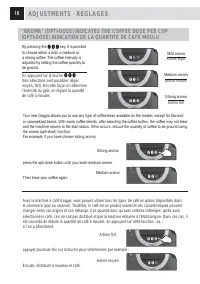
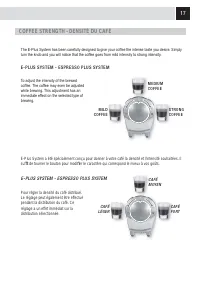
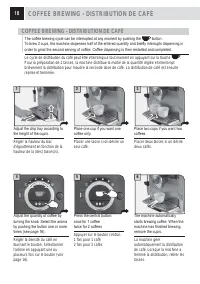

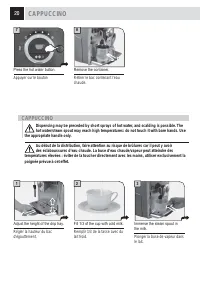
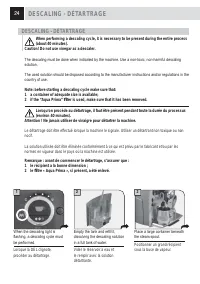
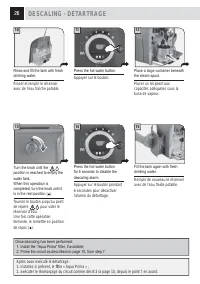
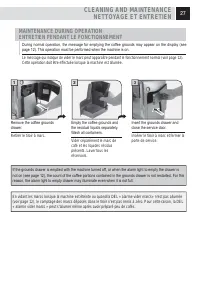
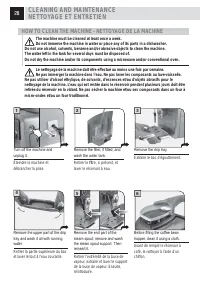
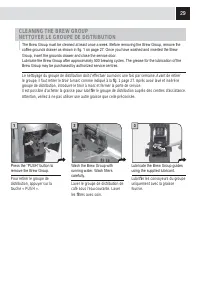
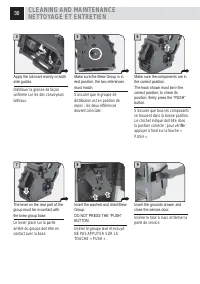

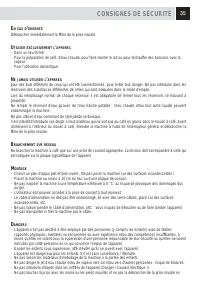
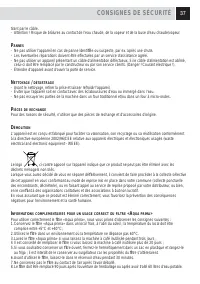
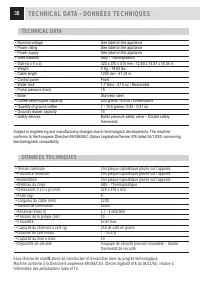
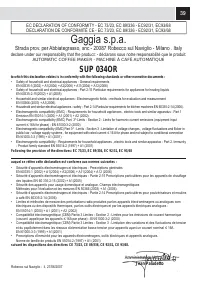

Table des matières:
- Page 2 – IMPORTANT; Lire toutes les instructions.; CONSERVER CES INSTRUCTIONS
- Page 4 – CONTENTS - TABLE DES MATIÈRES
- Page 5 – GENERAL INFORMATION; IN THESE CASES, THE WARRANTY IS NOT VALID.; GÉNÉRALITÉS; GENERAL INFORMATION - GÉNÉRALITÉS
- Page 6 – ACCESSORIES - ACCESSOIRES
- Page 7 – INSTALLATION - MONTAGE; STARTING THE MACHINE - MISE EN MARCHE DE LA MACHINE
- Page 9 – “AQUA PRIMA” FILTER - FILTRE « AQUA PRIMA »; “AQUA PRIMA” WATER FILTER - “AQUA PRIMA” FILTRE
- Page 10 – CONTROL PANEL - TABLEAU DE COMMANDE
- Page 12 – ADJUSTMENTS - RÉGLAGES; COFFEE VOLUME ADJUSTMENT PER CUP; DRIP TRAY HEIGHT ADJUSTMENT; QUANTITE DU CAFÉ EN TASSE
- Page 13 – COFFEE GRINDER ADJUSTMENT - RÉGLAGE DU MOULIN
- Page 15 – COFFEE STRENGTH - DENSITÉ DU CAFÉ
- Page 16 – COFFEE BREWING - DISTRIBUTION DE CAFÉ
- Page 17 – HOT WATER DISPENSING - DISTRIBUTION D’EAU CHAUDE; HOT WATER DISPENSING; DISTRIBUTION D’EAU CHAUDE
- Page 18 – CAPPUCCINO
- Page 21 – DESCALING - DÉTARTRAGE
- Page 23 – CLEANING AND MAINTENANCE; NETTOYAGE ET ENTRETIEN; MAINTENANCE DURING OPERATION; ENTRETIEN PENDANT LE FONCTIONNEMENT
- Page 24 – HOW TO CLEAN THE MACHINE - NETTOYAGE DE LA MACHINE
- Page 25 – CLEANING THE BREW GROUP; NETTOYER LE GROUPE DE DISTRIBUTION
- Page 29 – CONSIGNES DE SÉCURITÉ
- Page 31 – TECHNICAL DATA; TECHNICAL DATA - DONNÉES TECHNIQUES; DONNÉES TECHNIQUES
- Page 32 – Jean Paludetto
Operat ion and maintenance manual
Before using the machine, please read the attached operating instructions.
Carefully read the safety rules
Mode d'emploi
Veuillez lire attentivement le mode d'emploi
(notamment les consignes de sécurité) avant d'utiliser l'appareil.
FOR HOUSEHOLD USE ONLY
USAGE DOMESTIQUE SEULEMENT
„Téléchargement du manuel“ signifie que vous devez attendre que le fichier soit complètement chargé avant de pouvoir le lire en ligne. Certains manuels sont très volumineux, et le temps de chargement dépend de la vitesse de votre connexion Internet.
Résumé
3 IMPORTANT Lors de l’utilisation d’appareils électriques, il est indispensable de respecter toujours les précautions de sécurité principales, y compris les suivantes : 1. Lire toutes les instructions. 2. Ne pas toucher de surfaces chaudes. Utiliser les poignées ou les boutons. 3. Afin d’éviter tout...
6 GENERAL INFORMATION ................................................................................................................7APPLIANCE .......................................................................................................................................8 ACCESSORIES .........
7 GENERAL INFORMATION This coffee machine is suitable for preparing espresso coffee using coffee beans and it is equipped with a device to dispense steam and hot water. The machine is designed for domestic use and is not suitable for heavy or professional use. Warning: no liability is assumed for an...