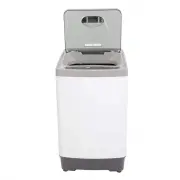
UTILISATION DE VOTRE LAVE PORTABLE; PRÉPARATION; Vérifiez que le tuyau de - MAGIC CLEAN MCLW14WI - Manuel d'utilisation - Page 14

Table des matières:
- Page 4 – SÉCURITÉ DE L'APPAREIL; Votre sécurité et celle des autres sont très importantes.; Symbole ainsi que les mots « DANGER », « AVERTISSEMENT » ou « ATTENTION ».
- Page 5 – IMPORTANT CONSEILS DE SÉCURITÉ; Remplacer tous les panneaux avant de faire fonctionner.
- Page 8 – CONSIGNES DE SÉCURITÉ IMPORTANTES; ATTENTION; Risque de piégeage des enfants.; Avant de jeter votre vieux lave-portable:; Enlever le couvercle.
- Page 9 – INSTRUCTIONS D'INSTALLATION; AVANT D'UTILISER VOTRE LAVE PORTABLE
- Page 10 – CONNEXION ROBINET ÉVIER
- Page 11 – DEBRANCHANT LE TUYAU D'ALIMENTATION EN EAU; Éteignez le robinet.; POSITIONNEMENT LE TUYAU DE VIDANGE; : Le point culminant du tuyau de vidange doit être la hauteur
- Page 12 – Attention
- Page 13 – PANNEAU DE CONTRÔLE; MARCHE / ARRÊT BOUTON
- Page 14 – UTILISATION DE VOTRE LAVE PORTABLE; PRÉPARATION; Vérifiez que le tuyau de
- Page 15 – AVANT LAVAGE
- Page 17 – Ferme la couverture.; AJOUT / DÉPOSE HABILLEMENT APRÈS LE DÉBUT DU PROGRAMME
- Page 18 – DÉPART DIFFÉRÉ; ENTRETIEN; NETTOYAGE DE VOTRE LAVE PORTABLE
- Page 19 – PROBLÈME
- Page 20 – SERVICE POUR VOTRE LAVE PORTABLE; MAGIC CLEAN PRODUITS SERVICES CLIENTS
46
UTILISATION DE VOTRE LAVE PORTABLE
PRÉPARATION
1. Raccorder le tuyau d'arrivée
d'eau au robinet d'eau.
2. Vérifiez que le tuyau de
vidange a été installé
correctement.
3. Insérer la fiche dans la prise.
Pour plus de sécurité le
bouchon doit avoir à la terre.
4. Insérer l'extrémité du tuyau
de vidange dans le plateau
de crochet, et accrocher le
tuyau de vidange sur une
sortie de vidange.
5. Ouvrez le robinet d'eau.
6. Mettez la charge de lavage
dans la baignoire de façon
uniforme.
7. Ajouter le détergent quantité appropriée des détergents.
8. Ferme la couverture. Sinon,
la rondelle ne sera pas laver
ou d 'essorage, et l'alarme
sonore retentit.
Operation
Step one: S
witch on the power supply.
P
ress the power button and the indicator will light as shown below.
Hot water only: Hot water can result in better cleaning effects. But it is not
suitable for all articles. It is best for washing whites and colorfast articles,
heavily soiled articles and diapers.
Warm water only: Warm water can reduce the chance of fading. It suits for
washing light and moderate soils clothes, dark color clothes, silks, woolens,
nylon, and acrylic.
Cold water only: Cold water is less effective in cleaning compared with hot or
warm water, but it does minimize wrinkling and fading. Use it for washing extra
sensitive clothes and for the rinse.
NOTE:
The washing machine will provide a cold rinse in all TEMPERATURE setting.
IMPORTANT:
There is not heating element in the washing machine. A single hose system does not
allow the washing machine to automatically (choose)regulate incoming water
temperatures to match those listed on the control panel such WARM or HOT.
Step two: C
hoose wash temperature
Press the water supply button, you can choose to inlet cold water and/or hot
water. When the cold-water indicator and the hot-water indicator turn on
simultaneously, which means you chose the warm water.
5.
Put suitable wash load
into the inner tub.
6.
Add suitable detergent
according to the wash
load volume into the
detergent .
box
of powder laundry
7.
Close wash lid completely.
(or else, it will not to spin
and give alarm.)
L E V 1
L E V 2
control panel
OPERATION INSTRUCTIONS
-10-
Note:
CONNECTION OF THE POWER SUPPLY CORD
Warning:
Note:
Use three jacks socket, which can be
connected grounding wire.
The grounding wire of the washing machine is
set in the plug, don't try to modify it.
The socket should have reliable grounding wire.
If no grounding wire in socket, please call the
technician to assemble.
Do not use the damaged power supply cord
because it could cause electrical leakage and fire.
In case
cord is damaged, call the
local Service Company to change it.
power supply
Never try to connect the grounding wire of the
washing machine together with that of gas pipe
or water pipe, telephone cord or lightening rod.
Preparation
1.
2.
Connect the water inlet
hose to the water faucet.
Turn on the water faucet.
3.
Plug in the power supply
cord.
4.Insert the end of the drain
hose into the hook shelf, and
hang the drain hose over a
drain outlet.
0.
7m
1.
2m
~
120
12
V.A.C.
±
0
V.A.C.
115
12
V.A.C.
±
L1
NEUTRAL
SIDE
ROUND
GROUNDING
PRONG
-9-
GROUNDING
OPERATION INSTRUCTIONS
„Téléchargement du manuel“ signifie que vous devez attendre que le fichier soit complètement chargé avant de pouvoir le lire en ligne. Certains manuels sont très volumineux, et le temps de chargement dépend de la vitesse de votre connexion Internet.
Résumé
36 SÉCURITÉ DE L'APPAREIL Votre sécurité et celle des autres sont très importantes. Nous avons fourni de nombreux messages de sécurité importants dans ce manuel et sur votre appareil. Toujours lire et obéir à tous les messages de sécurité. C'est le symbole d'alerte de sécurité. Ce symbole vou...
37 IMPORTANT CONSEILS DE SÉCURITÉ Avant de l'appareil est utilisé, il doit être correctement positionné et installé Décrit dans ce manuel, alors lisez attentivement le manuel. Pour réduire les risques d'incendie, choc électrique ou de blessure lors de l'utilisation de l'appareil, suivez les pré...
40 CONSIGNES DE SÉCURITÉ IMPORTANTES ATTENTION Pour réduire les risques d'incendie, d'électrocution ou de blessure lors de l'utilisation de votre laveuse portable, suivez ces précautions de base: • Lisez toutes les instructions avant d'utiliser la machine à laver portable. • Ne pas laver de...


