Floor Mounting; Wall Mounting; Position the Blower Location - JennAir JES1750ML - Manuel d'utilisation - Page 2
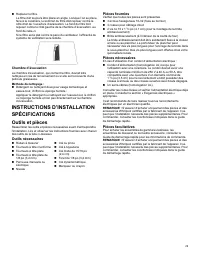
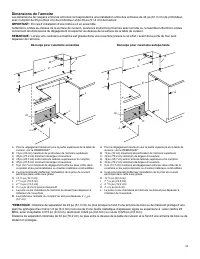

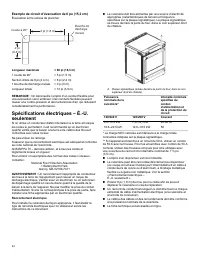
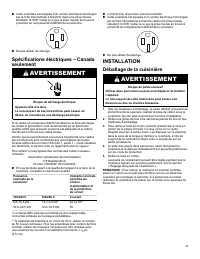
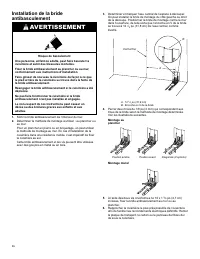
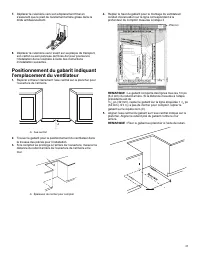
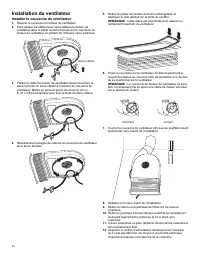
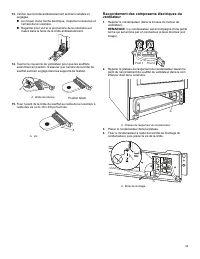
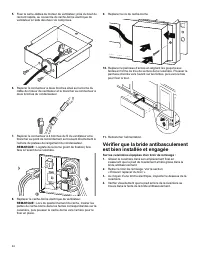
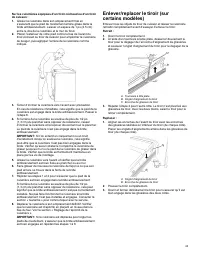
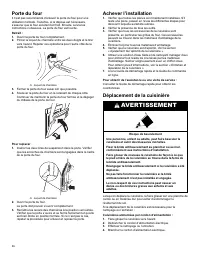

Table des matières:
- Page 2 – Floor Mounting; Wall Mounting; Position the Blower Location
- Page 3 – SÉCURITÉ DE LA CUISINIÈRE; Votre sécurité et celle des autres sont très importantes.
- Page 4 – INSTRUCTIONS IMPORTANTES DE SÉCURITÉ; CONSERVER CES INSTRUCTIONS
- Page 5 – Pour les cuisinières autonettoyantes; Pour les appareils avec hotte de ventilation
- Page 6 – Programme de nettoyage
- Page 7 – Nettoyage général
- Page 8 – Système de ventilation à évacuation par le bas; Grille de ventilation; Filtre
- Page 9 – Chambre d’évacuation; Méthode de nettoyage :; INSTRUCTIONS D’INSTALLATION; Outils et pièces; Outils nécessaires
- Page 10 – Exigences d’emplacement; Résidence mobile – Spécifications; Autres critères à respecter pour une installation en résidence
- Page 11 – Dimensions de l’armoire; Découpe pour cuisinière encastrée
- Page 12 – Exigences concernant l’évacuation; Pour une performance optimale :; Méthodes d’évacuation; Évacuation par le mur
- Page 13 – Calcul de la longueur du circuit d’évacuation; Composant
- Page 14 – seulement; Bouche de
- Page 15 – Déballage de la cuisinière; AVERTISSEMENT
- Page 18 – Évacuation par le mur arrière
- Page 19 – Réglage des pieds de nivellement; Risque de basculement
- Page 20 – Réglage de l’aplomb de la cuisinière; Installer à l’aide d’une connexion directe; Installation d’une connexion directe : Conducteur; po
- Page 21 – Spécifications de couple pour les fils nus
- Page 22 – Installation du ventilateur; Installer le couvercle du ventilateur
- Page 23 – Raccordement des composants électriques du
- Page 24 – Vérifier que la bride antibasculement
- Page 25 – Sur les cuisinières équipées d’un tiroir-réchaud ou d’un tiroir
- Page 26 – Porte du four; Achever l’installation; Pour obtenir de l’assistance ou une visite de service :; Déplacement de la cuisinière
- Page 27 – Pour les cuisinières avec câblage direct :; Risque de décharge électrique
13
4.
Drill two 1/8" (3 mm) holes that correspond to the bracket
holes of the determined mounting method. See the following
illustrations.
Floor Mounting
Rear position
Front position
Diagonal (2 options)
Wall Mounting
5.
Using the two #10 x 1
5
/
8
" (4.1 cm) Phillips-head screws
provided, mount anti-tip bracket to the wall or floor.
6.
Move range close enough to opening to allow for final
electrical connections. Remove shipping base, cardboard, or
hardboard from under range.
7.
Move range into its final location, making sure rear leveling leg
slides into anti-tip bracket.
8.
Move range forward onto shipping base, cardboard or
hardboard to continue installing the range, using the following
installation instructions.
Position the Blower Location
Template
1.
Determine and mark the centerline on the floor of the cabinet
opening.
A
A.
Centerline
2.
Locate the blower location template in the Installation Parts
Kit.
3.
If the countertop extends behind the opening, measure the
distance from the back edge of the cabinet cutout to the wall.
A
A.
Countertop Filler Depth
4.
Fold the top of the blower mounting/venting template on the
line that corresponds to the countertop depth measured in
Step 3.
Le montage du ventilateur doit être fait dans cette zone
RETIRER LE GABARIT AVANT DE FINALISER L'INSTALLATION
GABARIT D'INSTALLATION D'UN SYSTÈME DE VENTILATION À ASPIRATION DESCENDANTE
Numéro de la pièce W10765779B
© 2015. Tous droits réservés.
No Rear
Countertop
Filler Fold Here
Pas de
bouche-fente pour
comptoir arrière pour
replier ici
Fold On Line Based On
Countertop Filler Depth
Measurement
Replier sur la ligne en
fonction de la mesure de
profondeur du bouche-fente
pour comptoir
Le montage du ventilateur doit être fait dans cette zone
Part Number W10765779B
© 2015. All rights reserved.
NOTE:
The
template
has
lines
every
1/4"
(6.4
mm)
from
the
back
edge.
If
the
distance
measured
in
the
previous
step
is
1
1
/
4
"
(32
mm),
fold
the
template
on
the
line
labeled
1
1
/
4
"
(32
mm).
If
there
is
no
countertop
filler
depth,
fold
the
template
at
zero
depth.
Fold Here
„Téléchargement du manuel“ signifie que vous devez attendre que le fichier soit complètement chargé avant de pouvoir le lire en ligne. Certains manuels sont très volumineux, et le temps de chargement dépend de la vitesse de votre connexion Internet.
Résumé
13 4. Drill two 1/8" (3 mm) holes that correspond to the bracketholes of the determined mounting method. See the followingillustrations. Floor Mounting Rear position Front position Diagonal (2 options) Wall Mounting 5. Using the two #10 x 1 5 / 8 " (4.1 cm) Phillips-head screws provided, mou...
23 SÉCURITÉ DE LA CUISINIÈRE Votre sécurité et celle des autres sont très importantes. Nous donnons de nombreux messages de sécurité importants dans ce manuel et sur votre appareil. Assurez-vous de toujours liretous les messages de sécurité et de vous y conformer. Voici le symbole d’alerte de sécuri...
24 INSTRUCTIONS IMPORTANTES DE SÉCURITÉ AVERTISSEMENT : Afin de réduire le risque d’incendie, de décharge électrique ou de blessures corporelles lors de l’utilisation de cet appareil, observer certaines précautions fondamentales, notamment : � AVERTISSEMENT : POUR RÉDUIRE LES RISQUES DE BASCULEMENT ...
Autres modèles de cuisinières JennAir
-
 JennAir JDRP430HL
-
JennAir JDRP430HM
-
 JennAir JDRP436HL
-
JennAir JDRP436HM
-
JennAir JDRP536HL
-
JennAir JDRP536HM
-
 JennAir JDRP548HL
-
JennAir JDRP548HM
-
JennAir JDRP636HL
-
JennAir JDRP636HM