FILLING WATER TANK; RENSEIGNEMENTS; SUR LE; PRODUIT - Sharper Image SI-470 - Manuel d'utilisation - Page 10
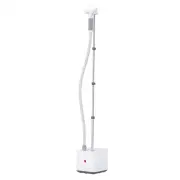
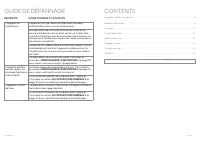
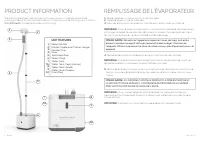
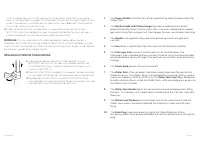
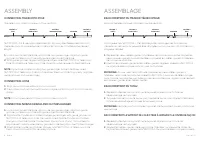
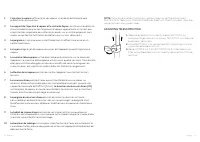
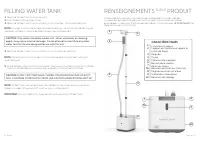
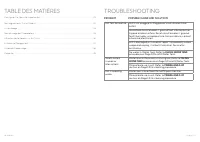
Table des matières:
- Page 2 – GARANTIE
- Page 3 – GUIDE DE DÉPANNAGE; CONTENTS
- Page 4 – IMPORTANT SAFETY INSTRUCTIONS; ENTRETIEN ET RANGEMENT
- Page 5 – UTILISATION; VAPEUR; TISSUS; SAVE THESE INSTRUCTIONS
- Page 6 – PRODUCT INFORMATION; REMPLISSAGE DE L’ÉVAPORATEUR
- Page 8 – ASSEMBLY; ASSEMBLAGE
- Page 10 – FILLING WATER TANK; RENSEIGNEMENTS; SUR LE; PRODUIT
- Page 11 – CONSERVER CES INSTRUCTIONS; FABRIC STEAMING
- Page 12 – CONSIGNES DE SÉCURITÉ IMPORTANTES
- Page 13 – TABLE DES MATIÈRES; TROUBLESHOOTING
10 English
1.
Remove Water Tank from main unit.
2.
Hold Water Tank upside-down.
3.
Remove Water Tank Cap by rotating it in a counter- clockwise direction.
NOTE:
In order to minimize potential mineral build-up and prolong the life of your
steamer, distilled or de-mineralized water is recommended.
4.
Replace Water Tank Cap by rotating it in a clockwise direction.
NOTE:
Place Drain Knob in locked position before replacing Water Tank and
operating unit.
5.
Place Water Tank back onto main unit. The sound of water flowing from Water
Tank into Water Reservoir should be audible for a short period of time
NOTE:
Water Tank can be removed and refilled at any time during operation –
there is no need to turn unit off or allow any cooling period.
IMPORTANT:
Do not attempt to operate unit with an empty Water Tank.
FILLING WATER TANK
CAUTION:
Only water should be used in unit – other chemicals or cleaning
agents may cause internal damage. Do not attempt to substitute any other
water tank for the one designed for use with this unit.
CAUTION:
IF UNIT TIPS OVER WHILE TURNED ON AND PRODUCING STEAM, IT
WILL CONTINUE TO PRODUCE STEAM. USE CAUTION WHEN PICKING UNIT UP.
31
Français
Votre unité est doté des caractéristiques présentées ci-après. Vérifiez
soigneusement l’emballage pour vous assurer d’avoir toutes les pièces
énumérées ci-dessous. S’il manque des pièces, communiquer (833.800.8669) ou
([email protected]).
RENSEIGNEMENTS
SUR LE
PRODUIT
7A
CARACTÉRISTIQUES
1
2
3
4
5
6
7
7A
8
9
10
L’injecteur à vapeur
Support de l’injecteur à vapeur et
cintre de façon
Poignée
Tuyau
Manche télescopique
Bouton de la vapeur
Réservoir d’eau
Bouchon du réservoir (Internal)
Poignée du réservoir d’eau
Hublot de niveau d’eau
Bouchon de vidange
1
2
3
4
5
6
8
7
9
10
„Téléchargement du manuel“ signifie que vous devez attendre que le fichier soit complètement chargé avant de pouvoir le lire en ligne. Certains manuels sont très volumineux, et le temps de chargement dépend de la vitesse de votre connexion Internet.
Résumé
39 Français Vornado Air, LLC garantit au consommateur initial ou à l’acheteur initial que ce Sharper Image® Produit vapeur (le « produit ») ne comporte aucun vice de matériau ou de fabrication pour une période d’un (1) an à compter de la date d’achat. Si un tel vice était décelé durant la période de...
38 Français GUIDE DE DÉPANNAGE CAUSE POSSIBLE ET SOLUTION PROBLÈME L’appareil ne chauffe pas. L’appareil n’est pas branché. Branchez le cordon d’alimentation dans une prise électrique. Le disjoncteur de circuit/de fuite à la terre de la rési-dence a été déclenché ou a fait sauter un fusible. Rée-ncl...
4 English IMPORTANT SAFETY INSTRUCTIONS This owner’s guide and any additional inserts are considered part of the product. They contain important information about safety, use and disposal. Before using the product, please familiarize yourself with all operating and safety instructions. Please keep a...