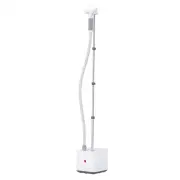
Sharper Image SI-470 - Manuel d'utilisation - Page 7

Table des matières:
- Page 2 – GARANTIE
- Page 3 – GUIDE DE DÉPANNAGE; CONTENTS
- Page 4 – IMPORTANT SAFETY INSTRUCTIONS; ENTRETIEN ET RANGEMENT
- Page 5 – UTILISATION; VAPEUR; TISSUS; SAVE THESE INSTRUCTIONS
- Page 6 – PRODUCT INFORMATION; REMPLISSAGE DE L’ÉVAPORATEUR
- Page 8 – ASSEMBLY; ASSEMBLAGE
- Page 10 – FILLING WATER TANK; RENSEIGNEMENTS; SUR LE; PRODUIT
- Page 11 – CONSERVER CES INSTRUCTIONS; FABRIC STEAMING
- Page 12 – CONSIGNES DE SÉCURITÉ IMPORTANTES
- Page 13 – TABLE DES MATIÈRES; TROUBLESHOOTING
34 Français
vous d’orienter le support de l’injecteur à vapeur et le cintre de façon que le
support de l’injecteur à vapeur soit dirigé vers l’avant de l’appareil. Cette position
aidera à améliorer la stabilité de l’appareil quand des vêtements lourds seront
accrochés sur le crochet de cintre.
3.
Faites glisser le support de l’injecteur à vapeur et le cintre de façon sur la
SECTION 1 du manche télescopique. Appuyez fermement jusqu’à ce que la
partie supérieure du manche se fixe solidement en place.
REMARQUE :
Si vous avez de la difficulté à repérer les deux arêtes-guides à
l’intérieur de la base du manche, insérez la SECTION 4 du manche télescopique
dans la base du manche, puis faites pivoter le manche pour aligner correctement
les rainures-guides et les arêtes-guides.
RÉGLAGE DU MANCHE TÉLESCOPIQUE
1.
Dégagez le verrou d’extension directement sous la
SECTION 1 en faisant basculer la charnière vers le côté,
comme illustré. Vous pouvez maintenant allonger ou rac
courcir la SECTION 1.
2.
Une fois la SECTION 1 réglée à la longueur désirée, rabattez
la charnière afin de fermer à nouveau le verrou d’extension.
3.
Répétez les ÉTAPES 1 et 2 pour les SECTIONS 2 et 3 du
manche télescopique, en utilisant le verrou d’extension situé
directement sous chacune de ces sections.
7
English
The
Steam Nozzle
emits the flow of hot, penetrating steam produced by the
Water Tank.
The
Nozzle Cradle and Clothes Hanger
provides a safe and convenient
place to hang the steam nozzle when not in use and is designed to support
garments hung from a clean rust-free hanger for easy, accessible steaming.
The
Handle
is designed to stay cool while providing maximum grip and
comfort.
The
Hose
directs steam flow from the main unit to the Steam Nozzle.
The
Telescopic Pole
connects to the main unit at the Pole Base. The
Telescopic Pole is divided into four sections, three of which can be extended
and lowered to a variety of heights for optimal user comfort and convenient
storage.
The
Steam Knob
powers the unit on and off.
The
Water Tank
is the container that holds water to be transferred into the
Water Reservoir. The Water Tank is removeable for convenient filling, up to a
maximum capacity of 54 oz (1597ml). The
Water Tank Cap
(7A)
is designed
to safely contain steam inside the Water Tank, while providing easy access to
the Water Tank’s fill hole.
The
Water Tank Handle
allows for convenient removal and grip when filling
the tank. This handle is not meant to be used to move the Canister Garment
Steamer.
The
Water Level Window
permits a clear view of the water level inside the
Water Tank, and is marked to indicate the maximum water level for easy
filling.
The
Drain Plug
is opened to easily empty the Water Reservoir of any
remaining water. Use caution and allow the unit to cool before removing the
plug.
1
2
3
4
5
6
7
8
9
10
„Téléchargement du manuel“ signifie que vous devez attendre que le fichier soit complètement chargé avant de pouvoir le lire en ligne. Certains manuels sont très volumineux, et le temps de chargement dépend de la vitesse de votre connexion Internet.
Résumé
39 Français Vornado Air, LLC garantit au consommateur initial ou à l’acheteur initial que ce Sharper Image® Produit vapeur (le « produit ») ne comporte aucun vice de matériau ou de fabrication pour une période d’un (1) an à compter de la date d’achat. Si un tel vice était décelé durant la période de...
38 Français GUIDE DE DÉPANNAGE CAUSE POSSIBLE ET SOLUTION PROBLÈME L’appareil ne chauffe pas. L’appareil n’est pas branché. Branchez le cordon d’alimentation dans une prise électrique. Le disjoncteur de circuit/de fuite à la terre de la rési-dence a été déclenché ou a fait sauter un fusible. Rée-ncl...
4 English IMPORTANT SAFETY INSTRUCTIONS This owner’s guide and any additional inserts are considered part of the product. They contain important information about safety, use and disposal. Before using the product, please familiarize yourself with all operating and safety instructions. Please keep a...


