Appliques; Aplicaciones; Аппликации - Brother LS-3125 - Manuel d'utilisation - Page 44


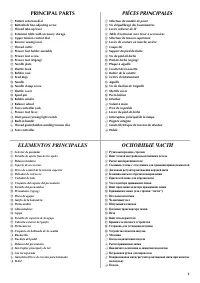
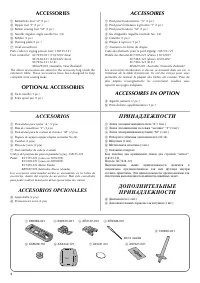
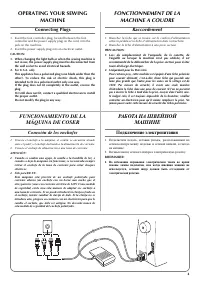
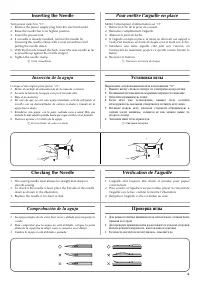
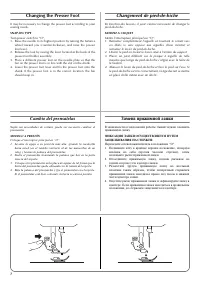
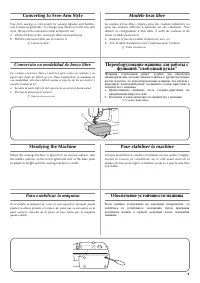
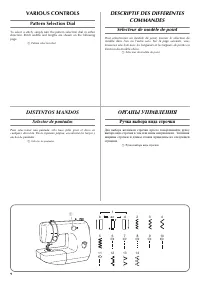
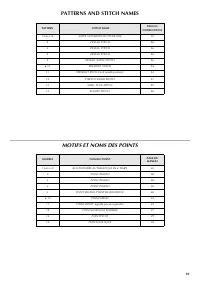
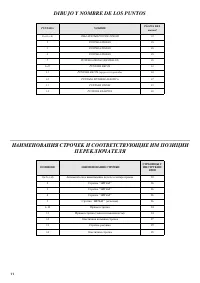
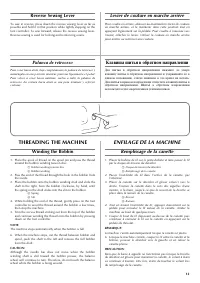
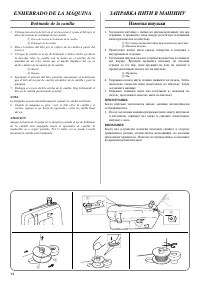
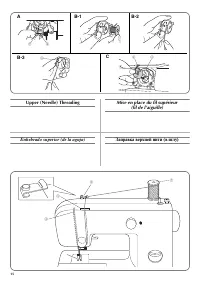
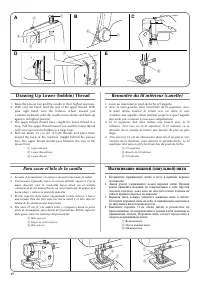
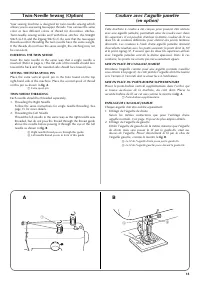
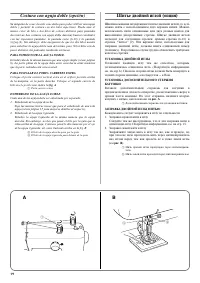
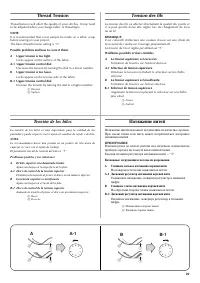
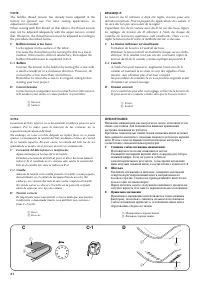
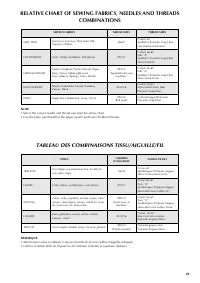
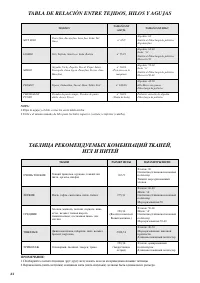
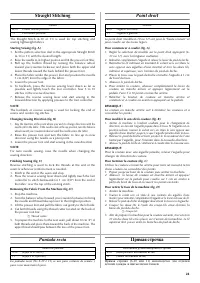
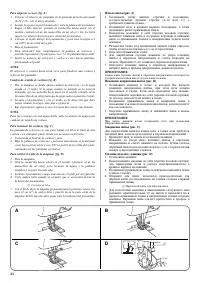
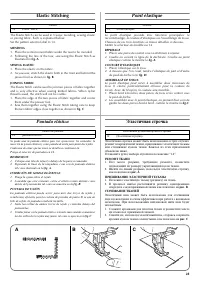
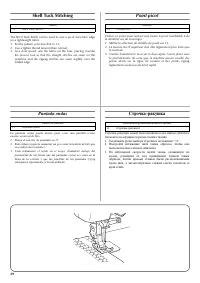


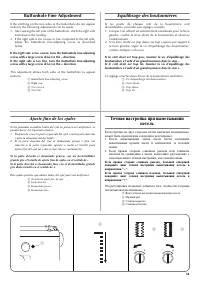
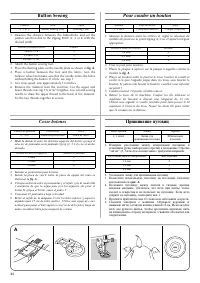
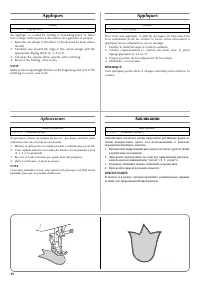
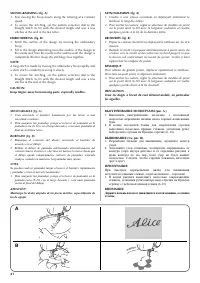
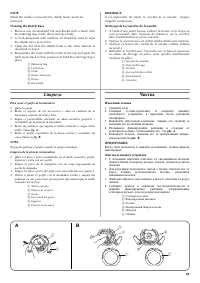


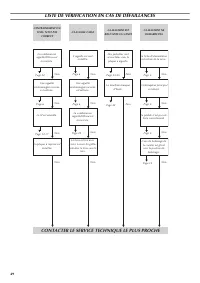
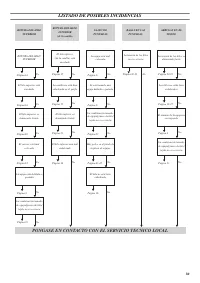
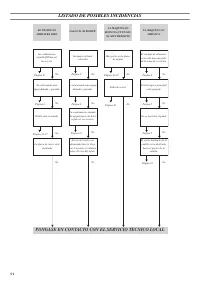
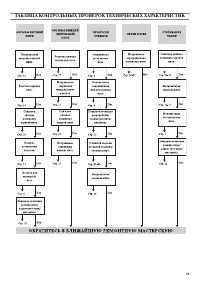

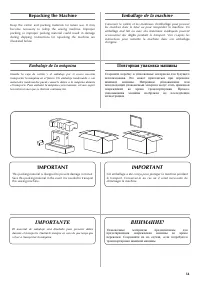

Table des matières:
- Page 4 – CONTENTS; TABLE DES MATIÉRES
- Page 8 – ACCESSORIES; OPTIONAL ACCESSORIES; ACCESSOIRES; ACCESSOIRES EN OPTION; ACCESORIOS OPCIONALES; ДОПОЛНИТ Е ЛЬНЫ Е
- Page 9 – Connecting Plugs; FONCTIONNEMENT DE LA; Raccordement; FUNCIONAMIENTO DE LA; Conexión de los enchufes; РАБОТА НА ШВЕЙНОЙ; Подключение электропитания
- Page 12 – Changing the Presser Foot; Cambio del prensatelas; Замена прижимной лапки
- Page 14 – VARIOUS CONTROLS; Pattern Selection Dial; DESCRIPTIF DES DIFFERENTES; DISTINTOS MANDOS; Selector de puntadas; ОРГАНЫ УПРАВЛЕНИЯ; Ручка выбора вида строчки
- Page 15 – PATTERNS AND STITCH NAMES; MOTIFS ET NOMS DES POINTS
- Page 17 – Reverse Sewing Lever; THREADING THE MACHINE; Winding the Bobbin; Levier de couture en marche arrière; ENFILAGE DE LA MACHINE; Remplissage de la canette; Palanca de retroceso; Клавиша шитья в обратном направлении
- Page 22 – Para sacar el hilo de la canilla
- Page 23 – TWIN NEEDLE THREADING; Couture avec l’aiguille jumelée
- Page 26 – Слишком слабое натяжение нижней нити.
- Page 27 – TABLEAU DES COMBINAISONS TISSU/AIGUILLE/FIL
- Page 29 – Straight Stitching; Point droit; Puntada recta; Прямая строчка
- Page 31 – Zigzag Stitching; ZIGZAG STITCH; Points zigzag; Puntadas zigzag; Шитьё строчкой “зигзаг”; СТРОЧКА “ЗИГЗАГ”
- Page 33 – Elastic Stitching; MENDING; SEWING ELASTIC; JOINING FABRIC; Point élastique; Puntada elástica; Эластичная строчка; РЕМОНТ ТКАНИ; ПРИШИВАНИЕ ЭЛАСТИЧНОЙ ТЕСЬМЫ; СТАЧИВАНИЕ ТКАНЕЙ
- Page 35 – Making a Buttonhole; MAKING A BUTTONHOLE; Création d’une boutonnière; Para coser ojales; Выметывание петель
- Page 38 – ЗАКРЕПЛЕНИЕ СТРОЧКИ И ПРОРЕЗКА ПЕТЛИ
- Page 39 – Buttonhole Fine Adjustment; Equilibrage des boutonnières; Ajuste fino de los ojales; Точная настройка при выметывании
- Page 40 – Button Sewing; Pour coudre un bouton; Coser botones; Пришивание пуговиц
- Page 41 – Zipper Insertion; Insertion de fermeture à glissière; Poner de cremalleras; Вшивание застежки “молния”
- Page 43 – Darning; Reprisage; Zurcido; Штопка
- Page 44 – Appliques; Aplicaciones; Аппликации
- Page 47 – Changing the Bulb; Remplacement de l’ampoule; Cambio de la bombilla; Замена лампочки подсветки
- Page 48 – Removing the Shuttle Hook; Graissage; Engrasado; Смазка
- Page 49 – Cleaning the Shuttle Race; Limpieza; Чистка; Извлечение челнока
- Page 50 – Cleaning the Feed Dogs; Performance Checklist; Liste de vérification en cas de; Listado de posibles incidencias; Очистка гребенок транспортера; Таблица контрольных проверок
- Page 51 – LISTE DE VÉRIFICATION EN CAS DE DÉFAILLANCES; CONTACTER LE CENTRE TECHNIQUE LE PLUS PROCHE
- Page 52 – CONTACTER LE SERVICE TECHNIQUE LE PLUS PROCHE
- Page 57 – Repacking the Machine; Emballage de la machine; IMPORTANT; Embalaje de la máquina; IMPORTANTE; Повторная упаковка машины
39
Appliques
An applique is created by cutting a contrasting piece of fabric
into a shape to be used as a decoration on a garment or project.
1. Baste the cut design to the fabric in the desired location where
desired.
2. Carefully sew around the edge of the cutout design with the
appropriate Zigzag Stitch (2, 3, 4 or 5).
3. Cut away the surplus fabric outside of the stitching.
4. Remove the basting, if necessary.
NOTE:
Make reinforcing Straight Stitches at the beginning and end of the
stitching to secure your work.
Pattern
2, 3, 4, 5
(Zigzag Stitch)
Appliques
Pour créer une applique, il suffit de découper un morceau d’un
tissu contrastant et de lui donner la forme d’une décoration à
appliquer sur un vêtement ou sur un ouvrage.
1. Faufiler le motif découpé à l’endroit souhaité.
2. Coudre soigneusement le contour du motif avec le point
zigzag approprié (2,3,4 ou 5).
3. Couper la partie de tissu dépassant de la couture.
4. Défaufiler, si nécessaire.
REMARQUE:
Faire quelques points droits à chaque extrémité pour renforcer la
couture.
Modèle
2, 3, 4, 5
(Point zigzag)
Aplicaciones
Si queremos colocar un aplique de piel etc. que haga contraste, para
utilizarla como decoración en una prenda.
1. Hilvane la aplicación recortada al tejido, en donde desee ponerla.
2. Cosa cuidadosamente los bordes del diseño con la puntada zigzag
(2, 3, 4 ó 5) apropiada.
3. Recorte el tejido sobrante que quede fuera del pespunte.
4. Quite los hilvanes, si fuera necesario.
NOTA:
Cosa unas puntadas rectas como refuerzo al principio y al final de las
puntadas para que no puedan deshacerse.
Número de puntada
2, 3, 4, 5
(Puntada zigzag)
Аппликации
Аппликация создаётся путём вырезания различных форм из
ткани контрастного цвета для использования в качестве
украшения швейного изделия.
1. Приметайте вырезанный рисунок на полотно другой ткани
в требуемом положении.
2. Аккуратно пристрочите по контуру вырезанный рисунок,
используя подходящий шов “зигзаг” (2, 3, 4 или 5).
3. Обрежьте излишки ткани с внешней стороны шва.
4. При необходимости удалите наметку.
ПРИМЕЧАНИЕ:
В начале и в конце строчки прошейте усилительные прямые
стежки для закрепления Вашей работы.
Вид строчки
2, 3, 4, 5
(Строчка “зигзаг”)
„Téléchargement du manuel“ signifie que vous devez attendre que le fichier soit complètement chargé avant de pouvoir le lire en ligne. Certains manuels sont très volumineux, et le temps de chargement dépend de la vitesse de votre connexion Internet.
Résumé
CONTENTS Page PRINCIPAL PARTS.................................................................... 1PRINCIPAL PARTS.................................................................... 2ACCESSORIES .......................................................................... 3OPERATING YOUR SEWING MACHIN...
3 ACCESSORIES a Buttonhole foot “A” (1 pc.) b Zipper foot “I” (1 pc.) c Button sewing foot “M” (1 pc.) d Needle (regular single needle No. 14) e Bobbin (1 pc.) f Darning plate (1 pc.) g Oval screwdriver Parts code for zigzag presser foot: 138135-121Foot controller: XC7359-021 (110/120V Area) XC7438-...
4 OPERATING YOUR SEWING MACHINE Connecting Plugs 1. Insert the foot controller plug, located between the foot controller and the power supply plug on the cord, into the jack on the machine. 2. Insert the power supply plug into an electrical outlet. CAUTION:1. When changing the light bulb or when the...
Autres modèles de machines à coudre Brother
-
 Brother JS-23
-
 Brother LS 2150
-
 Brother LS-1520
-
 Brother LS-2125
-
 Brother SL-7
-
 Brother X-5