Brother PR-600/600C- Manuels
Brother PR-600/600C- Manuel d'utilisation, Notice en ligne au format PDF.
Manuels:
Manuel d'utilisation Brother PR-600/600C


Résumé
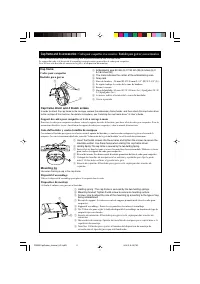
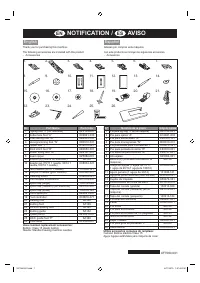
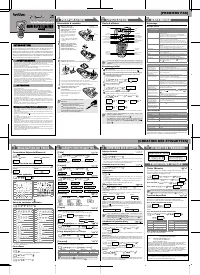
Cap frame and its accessories / Cadre pour casquettes et accessoires / Bastidor para gorras y sus accesorios The cap frame driver and the mounting jig are required in order to use the cap frame. Le support du cadre et le dispositif d’assemblage sont nécessaires pour utiliser le cadre pour casquettes...
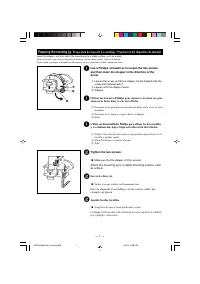
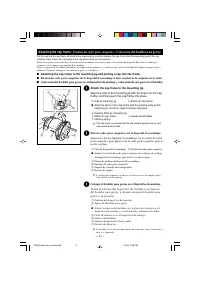
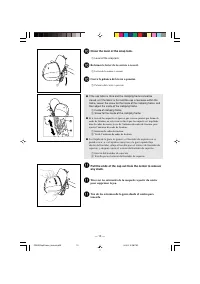
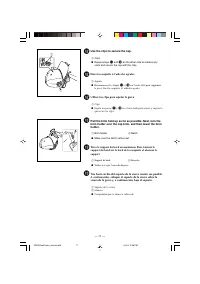
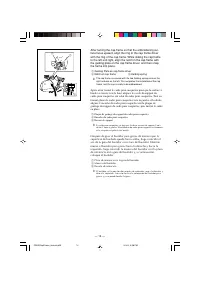
— 1 — Preparing the mounting jig / Préparation du dispositif d’assemblage / Preparación del dispositivo de montaje Lower the stopper, and then attach the mounting jig to a stable surface, such as a desk. Abaissez la butée, puis fixez le dispositif de montage sur une surface stable, telle qu’un burea...
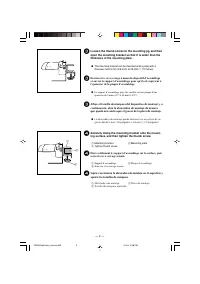
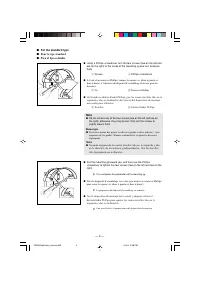
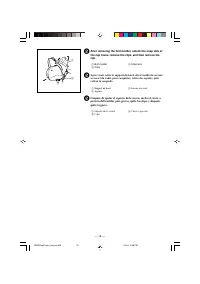
— 3 — 5 Check that there is no looseness. If there is looseness, mount the mounting jig onto the plateagain. 5 Veillez à ce qu’il n’y ait pas de jeu. Si tel est le cas, réinstallez le dispositif d’assemblage sur laplaque. 5 Compruebe que no hay holgura. Si hay holgura, vuelva a colocar el dispositiv...
Notice Brother PR-600/600C


Résumé
Cap frame and its accessories / Cadre pour casquettes et accessoires / Bastidor para gorras y sus accesorios The cap frame driver and the mounting jig are required in order to use the cap frame. Le support du cadre et le dispositif d’assemblage sont nécessaires pour utiliser le cadre pour casquettes...
— 1 — Preparing the mounting jig / Préparation du dispositif d’assemblage / Preparación del dispositivo de montaje Lower the stopper, and then attach the mounting jig to a stable surface, such as a desk. Abaissez la butée, puis fixez le dispositif de montage sur une surface stable, telle qu’un burea...
— 3 — 5 Check that there is no looseness. If there is looseness, mount the mounting jig onto the plateagain. 5 Veillez à ce qu’il n’y ait pas de jeu. Si tel est le cas, réinstallez le dispositif d’assemblage sur laplaque. 5 Compruebe que no hay holgura. Si hay holgura, vuelva a colocar el dispositiv...
Brother Manuels
-
 Brother 750E
Notice
Brother 750E
Notice
-
 Brother 882-C42
Manuel d'utilisation
Brother 882-C42
Manuel d'utilisation
-
 Brother 882-W04
Manuel d'utilisation
Brother 882-W04
Manuel d'utilisation
-
 Brother DCP-167C
Manuel d'utilisation
Brother DCP-167C
Manuel d'utilisation
-
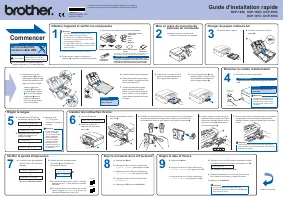
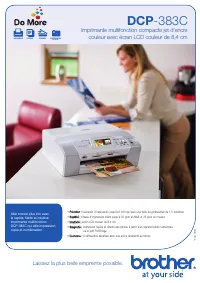 Brother DCP-383C
Manuel d'utilisation
Brother DCP-383C
Manuel d'utilisation
-
 Brother DZ2400
Manuel d'utilisation
Brother DZ2400
Manuel d'utilisation
-
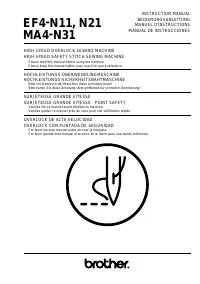 Brother EF4-N11
Manuel d'utilisation
Brother EF4-N11
Manuel d'utilisation
-
Brother EF4-N11
Notice
-
 Brother EF4-N21
Manuel d'utilisation
Brother EF4-N21
Manuel d'utilisation
-
Brother EF4-N21
Notice
-
 Brother EF4-B682
Manuel d'utilisation
Brother EF4-B682
Manuel d'utilisation
-
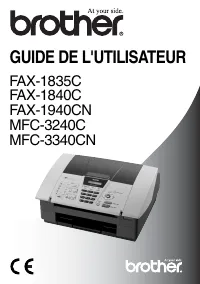 Brother FAX-1835C
Manuel d'utilisation
Brother FAX-1835C
Manuel d'utilisation
-
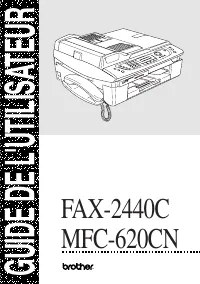 Brother FAX-2440C
Manuel d'utilisation
Brother FAX-2440C
Manuel d'utilisation
-
 Brother FAX-T102
Manuel d'utilisation
Brother FAX-T102
Manuel d'utilisation
-
 Brother GL-200
Manuel d'utilisation
Brother GL-200
Manuel d'utilisation
-
 Brother HE-240
Manuel d'utilisation
Brother HE-240
Manuel d'utilisation
-
Brother HE-240
Notice
-
 Brother HL-1670N
Manuel d'utilisation
Brother HL-1670N
Manuel d'utilisation
-
 Brother HL-5240
Manuel d'utilisation
Brother HL-5240
Manuel d'utilisation
-
 Brother HL-760
Manuel d'utilisation
Brother HL-760
Manuel d'utilisation